In this guide you will learn how to install an SSL certificate using the Let’s Encrypt feature inside cPanel.
Quick Steps:
- Login to cPanel, locate and click the “Lets Encrypt” icon.
- On the Installation screen, select the domain and click “issue” and you will be presented with the Options screen.
- We recommend installing both versions, including www. However, if you are installing the SSL for a sub-domain, you don’t need to include the www.
- Click “Issue” to install the SSL certificate.
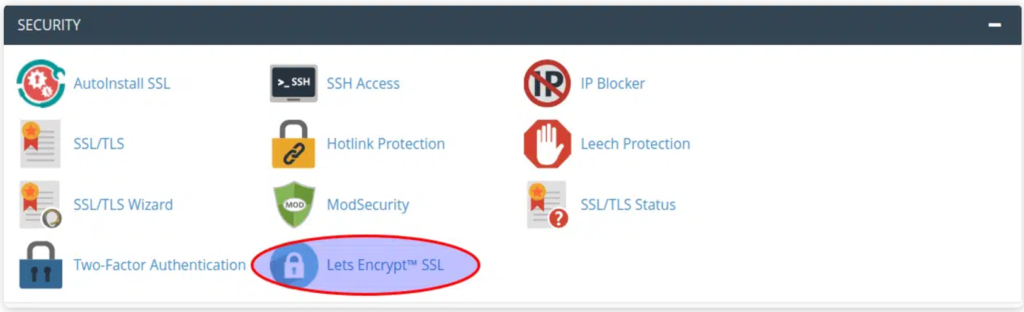
To use the Let’s Encrypt option found in cPanel to install a free SSL Certificate you’ll first need to locate & click the Let’s encrypt icon.
Important Note: The domain you are installing Let’s Encrypt on MUST resolve to our servers as Let’s Encrypt verifies the validity of the domain by using a text string that is automatically placed on the account from the plugin. If the domain is not resolving to our servers (not using our DNS/nameservers), you will get an error.
lets-encrypt-installation-screen-issue
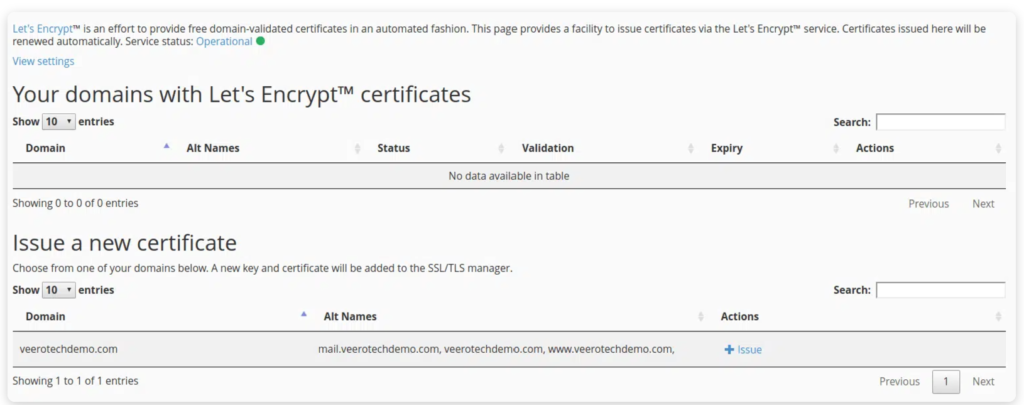
After you’ve clicked the Let’s Encrypt icon, you’ll then be presented with the installation screen as shown below:
lets-encrypt-installation-screen-issue
Once you’ve chosen the domain you’d like to install the SSL Certificate on click “Issue”, which is found to the far right of the domain. (See image below)
lets-encrypt-installation-screen-issue
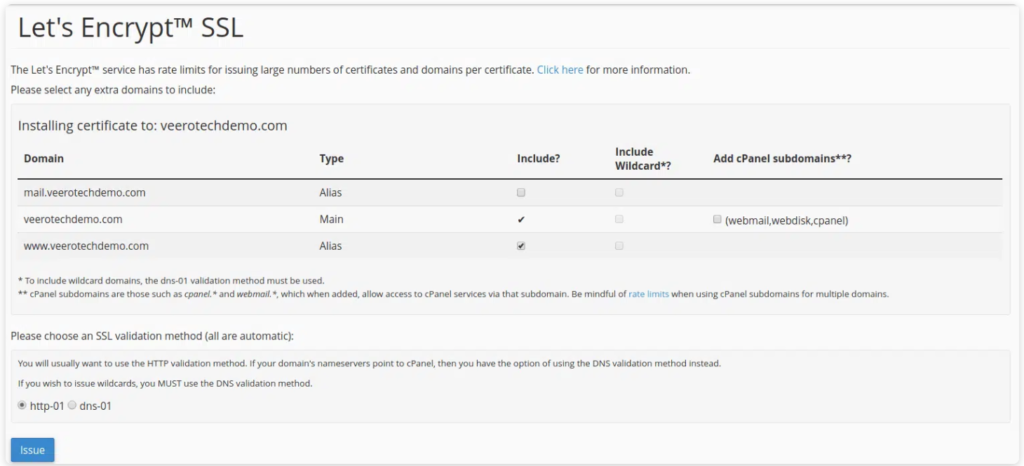
Once you’ve clicked “Issue”, you’ll be presented with the options screen. From here, we recommend installing both versions including www however, if you are installing the SSL for a sub-domain, you don’t need to include the www.
lets-encrypt-installation-screen-issue
Lastly, once you’ve clicked “Issue” to install the SSL Certificate, you’ll see a screen similar to of that shown below.

lets-encrypt-installation-screen-issue
That’s it! Your SSL should now be installed and you can begin typing https:// for your domain. Please note, if you have a URL based website using an application such as WordPress or Joomla, you will need to configure your site’s URL to use https:// in the website’s settings.
Note: After the installation you’ll notice the completion message states “Apache is restarting” – as we utilize LiteSpeed Web Server, you can disregard the “Apache”, this is simply just a generic message.
In some instances, you may have certain .htaccess rules that could cause a conflict with the renewal process for the Let’s Encrypt certificate. In this case, we recommend adding the following lines to the top of your .htaccess file pertaining to the domain in question:
RewriteEngine On
 RewriteRule ^.well-known - [L]